Before you can create a listing, you will need to be registered. If you have not already registered, please register here.
Step 1 - Login:
Log in and click the "Sell" button in the main menu. (you can also access a new listing from "My Account" page and clicking on "New classified" in the menu).
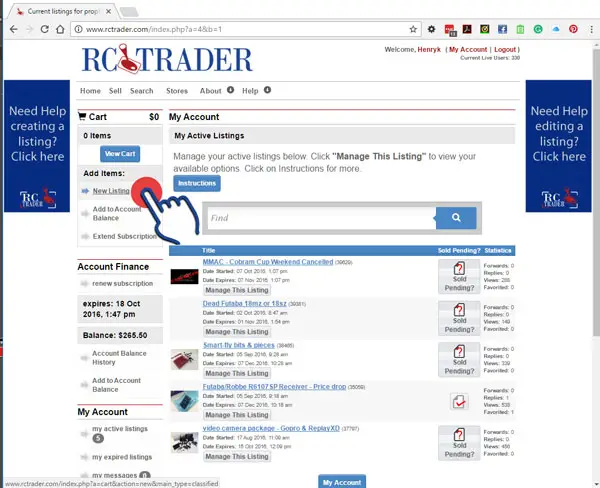
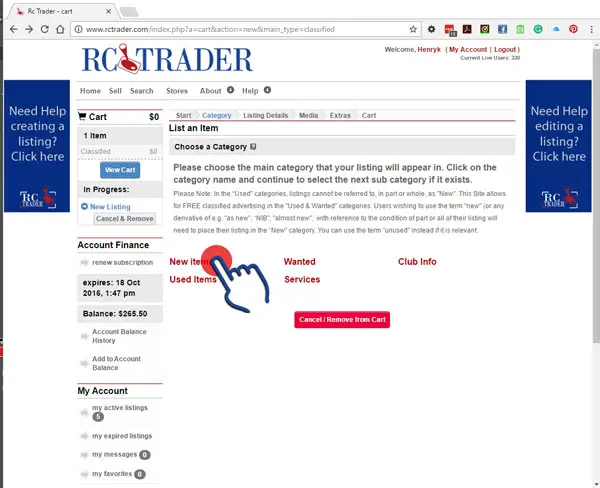
Step 2 - Select categories:
You will now go through the process of selecting the categories you want your listing to be placed in. Continue selecting sub-categories until you have reached the category your listing will be placed in (until no further options are available). (Please note, some categories incur a charge. For further information on pricing, please view the pricing page).
Step 3 - Listing details:
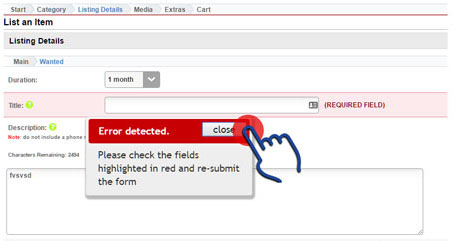
Next you are now presented with the listing information page. Please fill in all of the fields as best you can. Some fields of information will have an impact in other areas that may not seem immediately obvious. e.g. the currency field.
DO NOT include your email address or your phone number in the description field. This increases the risk of your information being abused. This information is presented to registered users in the specified fields. (Note: only registered users will see your contact information).

When you have completed the form, select the "next step>>" button at the bottom of the page.
If you are presented with and error message and the listing information page again, check that there are no required fields that you may have missed. They will be highlighted in red.
Step 4 - Upload images:
Here you will be presented with the opportunity to add your images. You can add up to four images for free (extra images at a cost - For further information on pricing, please view the pricing page).
Click the "select files" button that will open a browse window. Select the image file(s) you want to upload (maximum file upload size is 10MB [10485760bytes])
The allowed image upload types are JPEG (jpg), GIFF (gif), BMP (bmp), PNG (png) or TIFF (tif).
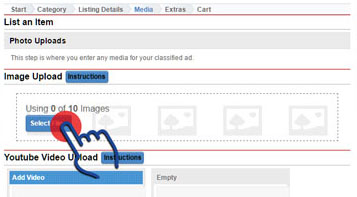
Once you have selected your images, click the "open" button and your images will start uploading automatically.
Note - if you continue before your images are fully uploaded they will not appear correctly. Please note that depending on your image size and your internet connection speed, this may take up to a few minutes.
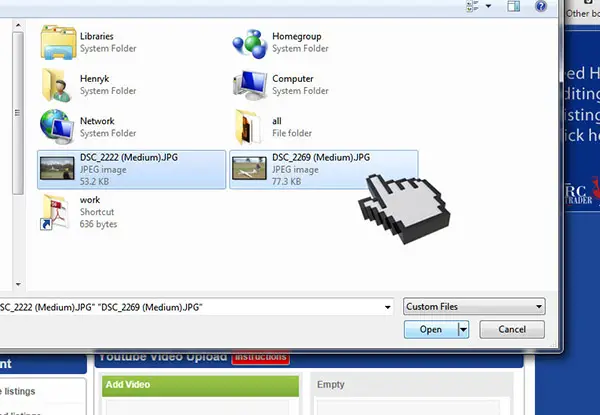
When the upload is complete, the image thumbnail for the image you just uploaded. You can select multiple images at once.
Once the images have finished uploading, they will be shown in the thumbnails.
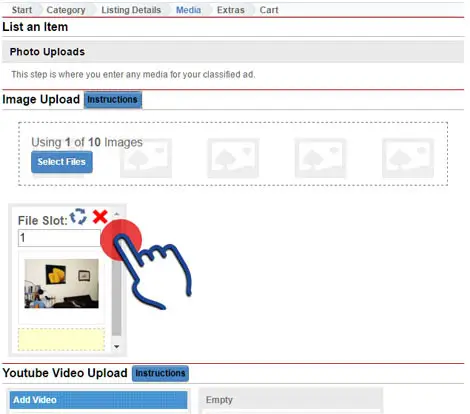
At this point you can "rotate", "change the order" or "delete" images using the buttons associated with that image. For more information on those items, press the "instructions" button on the page or view this help page.
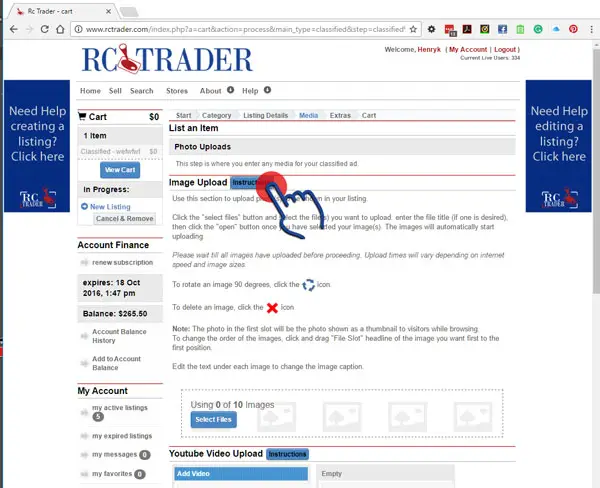
When you have uploaded all your images, press the "Continue" button at the bottom of the page.
NOTE Image File Uploads: Maximum file upload size is 10MB (10485760bytes). Only file types with the following extensions are supported: gif, jpeg, jpe, jpg, bmp, png. The system resizes all images to a maximum of 800pixels on the longer side, so resizing your images before uploading will make for faster upload times.
Step 5 - Listing extras:
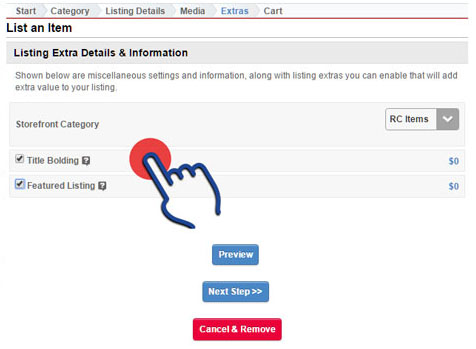
Here you are shown any additional extra features available for your listing. The associated prices are displayed. Click "Next Step" to continue.
If you have a storefront subscription, this is where you will allocate your storefront category to your listing. This is separate from the original listing category.
Step 6 - Check out:
Here you get to review any costs associated with your listing. If there are no costs, you are presented with a $0 value and you can just select the "checkout" button to submit your listing for approval. If you have more listings to create, click "Add another listing" to start the process again and add more items to your cart.
If you have more listings to create, click "Add another listing" to start the process again and add more items to your cart. This reduces the number of PayPal transactions you need to do if payment is required.
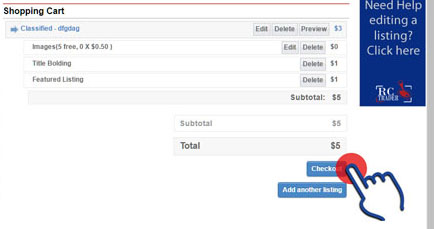
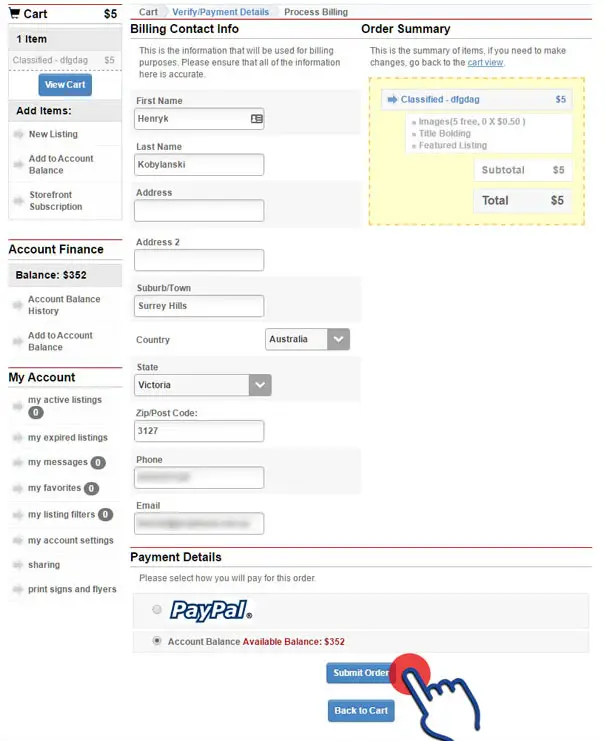
If you have associated costs, you will be asked to make payment via PayPal if there is no credit in your account. If you have previously added funds to your account, you can use the "account balance" as payment method instead.
When your listing is complete, you are presented with the following confirmation screen.
Please note that all listings need to be approved by an admin before they are published as live. Although this process can take up to 24hrs depending on when your listing is submitted, normally they are approved much faster. You will be notified via email when your listing has been approved and is live.
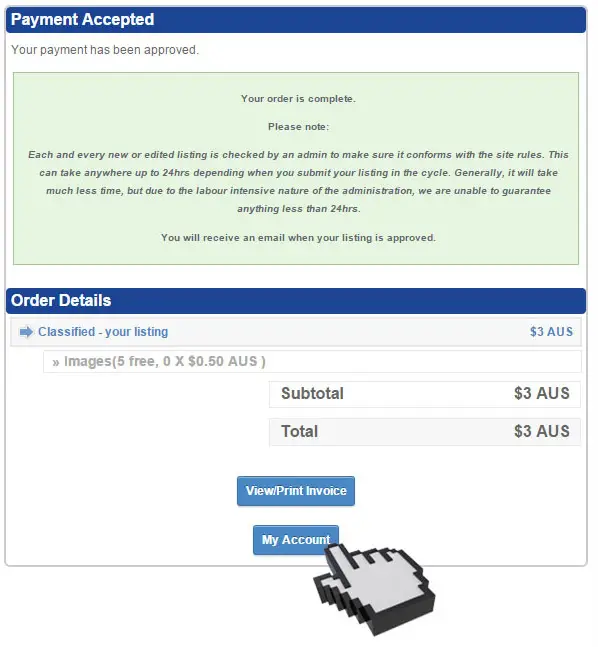
You may also want to print your invoice for this transaction.